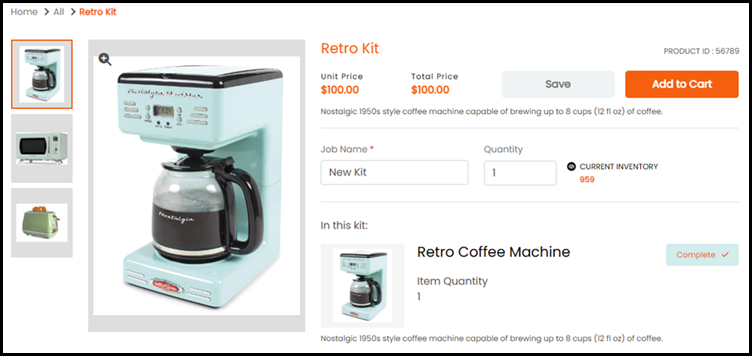
Kit products are a set of non-kit products assembled into a package and purchased together. You can associate any product type to a Kit except for another Kit.

 Create
the Kit product
Create
the Kit product1 Go to Administration > Products.
2 Click Create Product.
3 Complete the fields in the Create product window:
● Name: Enter a name for the product.
● SKU / Product ID: Enter a unique alphanumeric value to easily track the product.
● Display As: Enter a name for the product that will be visible to the buyer.
The Display As value will be the same as the Name field by default.
● Product Type: Choose Kit from the drop-down list.
4 Click Create.
5 Complete the settings in the Product Information tabs.
6 Click Save.
General
informationThe General information section in the Product Information header provides general details about the product.
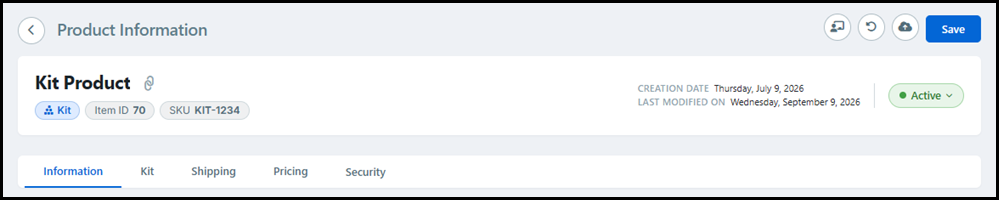
● Product Name: Name entered for the product when it was created. This information is auto-populated from the Create Product window.
● Copy Short URL: Click to copy a link directly to the product's page. The link is created using the SKU/Product ID following the format http://[site domain]/DSF/PRODUCTS/SKU/[SKU].aspx.
The Short URL is often used for marketing purposes.
● Product Type: Display-only field showing the product type.
● Item ID: Unique, system-generated identifier created when the product is saved.
● SKU: Unique SKU/Product ID for the product.
● Creation Date: Date the product was created.
● Last Modified On: Date the product was last edited.
● Status: Click the icon to make the product Active or Inactive. Active products are available for ordering once published to a storefront.
Information
tabThe Information tab is where you configure important information about the product such as basic details, availability, and order quantity rules.
● Product Name: Name entered for the product when it was created.
● Display As: Name for the product that will be visible to the buyer.
● SKU: Unique SKU/Product ID for the product.
● Buy Now Button Text: Custom text for the storefront's Buy Now button. The default text is Buy Now.
● Display Priority: Choose the display priority from the drop-down list. This determines whether the product appears higher or lower on the storefront page.
● Company: Assign the product to the selected company.
● Commodity Code: Enter a tax code to specify the type of item for more accurate tax calculations. Commodity Codes are available from your external tax service provider.
● Item Template: Enter the name of the MIS template to associate with the product. This will connect the product to a particular estimate in the MIS, so it knows which specifications should be used to produce the print job. The system populates the Product ID field for Fulfillment products sent from the MIS.
The
Item Template field will only be displayed when
MarketDirect StoreFront
is integrated with an MIS.
For PrintSmith Vision integrations, Product
ID will be used to link
all products.
● Description Footer: Enter additional product information shown on the storefront and product details page.
● Description: Click the toggle to switch between Short and Long descriptions.
● The Short description is shown on the storefront. It has a 2,000 character limit.
● The Long description is shown on the full product details page. It has a 4,000 character limit.
● Product Images / Thumbnail Upload As: Designates each uploaded image as the Product Icon (thumbnail), Detail Image(s) (product details page only), or Both.
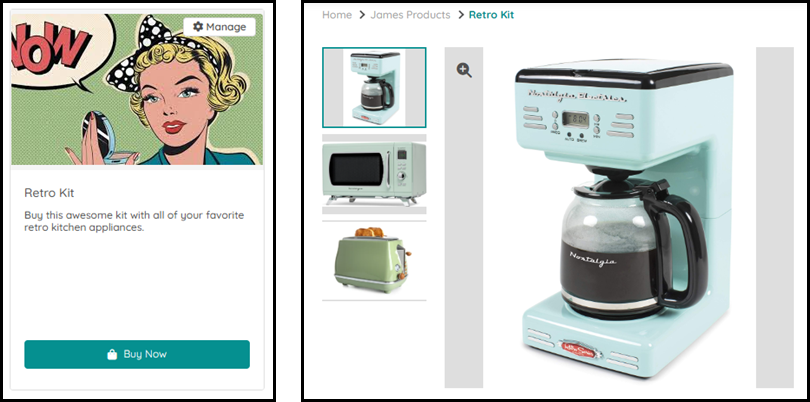
Only one image can be the Product
Icon, which is marked
with a black star.
If you change the Product Icon
by clicking the star, then the previous Product
Icon will become a details image.
If you upload multiple images as both the product icon and details
image, then only the first image uploaded will be the Product
Icon.
If you already have a Product
Icon assigned and upload another image as the Product
Icon or both, then the new image will overwrite the existing
Product Icon.
● Keywords: Enter keywords to help search engines locate the product. Keyword must be separated by commas.
● Production Notes: Enter internal notes for the production team. These notes will appear on the job ticket and tickets sent to output devices.
● Valid From: Select the date the product becomes active.
● Expiration date: Select the date the product becomes inactive.
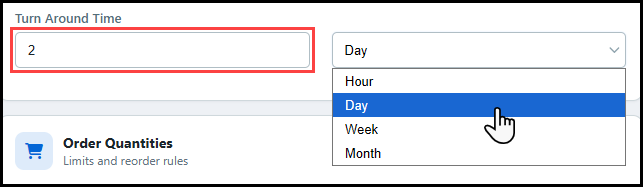
● Turn Around Time: Enter the turnaround time to process the order.
● Enter a numeric value into the Turn Around Time field and choose the unit of time to measure the value. Turn Around Time is measured in Hour, Day, Week, and Month.
● Any quantity: Select to allow buyers to order any quantity of the product.
● Maximum Order Qty Permitted: Enter the maximum quantity, up to 100,000 items, the buyer can order during a single purchase.
● Fixed quantities: Select to define specific quantities of the product the buyer can choose to order (e.g., 100, 200, 300).
● Quantity: Enter the individual fixed-quantity entries. Add, Edit, or Delete the entry using the fixed-quantity tools.
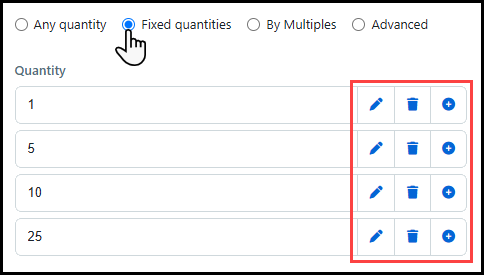
The Fixed quantities option presents the buyer with a quantity drop-down list on the storefront.
● By Multiples: Select to define set increments of the product the buyer can order.
● Minimum: Enter the minimum quantity buyers must order.
● Maximum: Enter the maximum quantity buyers can order.
● Increment: Enter the increment buyers must order in (e.g., Minimum=2 and Increment=2 allows orders of 2, 4, 6...).
● Advanced: Select to specify a complex quantity option in order to match a pricing structure.
● Quantities: Enter a regular expression that defines quantity options.
The
Advanced option presents the buyer with
a quantity drop-down list on the storefront.
For more information on regular expressions, see Quick
Reference on Regular Expressions.
● Multiple Recipients (SmartStores only) determines how the minimum quantity is enforced across a split order.
It is only is available when Order Quantities is set to Fixed, Multiple, or Advanced.
● Each recipient set to a valid quantity: Select to enforce the minimum order quantity for every recipient individually.
● Total quantity must add up to a valid quantity: Select to enforce the minimum order quantity only against the combined total across all recipients.
● Enforce Max Quantity Permitted in Cart: Enable to apply the Maximum Order Qty Permitted limit at the cart level.
● Enable Price Grid: Enable the Price Details table to be visible to the buyer. The Price Details table displays the unit price of the product at different quantities so they can see discounts for ordering in bulk.
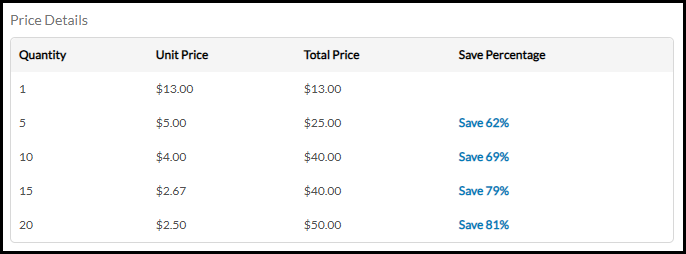
● Add, Edit, or Delete a quantity row using the table tools.
The Insert Below icon will add a row below the current entry, whereas the Add Level icon will add a row to the end of the table.
● Show Save % (percentage): Enable the Save Percentage column in the price grid.
● Basis: Select the quantity to serve as the base of the Save Percentage.
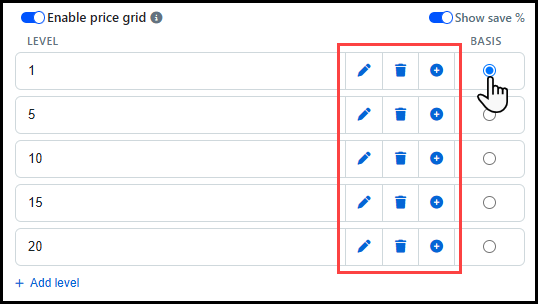
The Save Percentage column will automatically calculate a buyer's potential savings compared to the Basis quantity. If there are no savings available for a column, then it will be blank. For example, if you set up a product to be less expensive the more you buy and you choose a Basis quantity in the middle of the list (such as 20), then savings will only appear for the higher quantities (such as 30 and 40). The Save Percentage column for the Basis quantity will always be blank.
● Mobile Supported: Enable the product to be shown and available for purchase to buyers using mobile devices.
● Apply Pricing Group to Kit Items: Enable to apply group level pricing to the products that are part of a group in the Kit, and not the Kit itself. The group price is determined by the quantity of all the products in the Kit.
If
a Kit
contains grouped and non-group products, then group pricing will
only be applied to the grouped products.
For example, if a customer purchases
10 Kits
each with 3 group products in the Kit, then they will be purchasing 30
products. The group pricing will be applied to the cost of purchasing
30 group master products, and not the cost of purchasing 10 group
master products.
● Show Pricing Summary: Enable a detailed pricing summary of the Kit to be visible to the buyer when they hover on the Total Price in the shopping cart.
● Min Kit Qty by Subcomponents: Enable a display of the minimum number of Kits that can be created based on the current inventory of each product in the Kit. The quantity will appear to the buyer in an Available Quantity section on the product thumbnail, as well as a Current Inventory section on the product page.
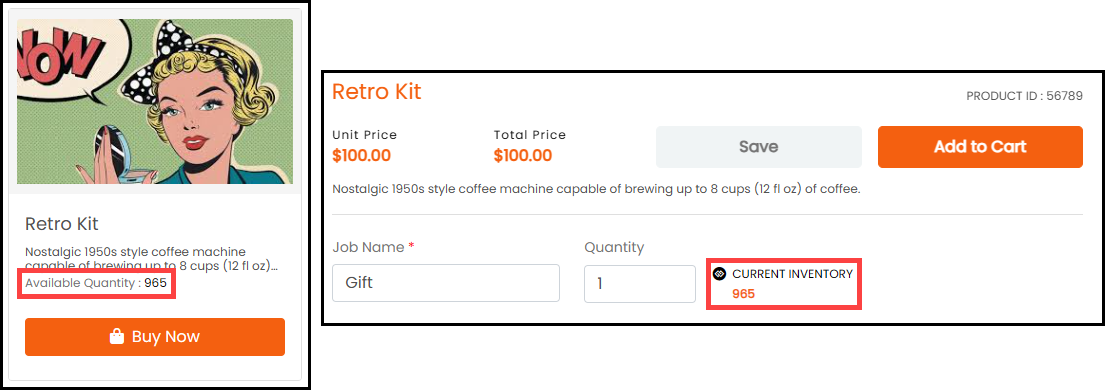
If the Allow Back Order setting is enabled for a product within the kit, then the Show inventory when back order is allowed setting must also be enabled or the Available Quantity and Current Inventory fields will not appear on the storefront.
● ReOrder Product Behavior: Select the re-order behavior for the product.
● Based on Kit Configuration of Last Order: Buyer will re-order the Kit exactly as it appeared in the last order.
● Based on Current Kit Configuration: Buyer will re-order the current version of the Kit product.
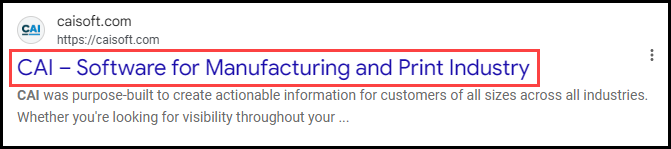
● SEO Title: Enter the product page title shown in search results. The default SEO Title is the product name.
● URL Slug: Enter the URL-friendly version of the product name. The default URL Slug is the product name with spaces replaced by hyphens and non-alphanumeric characters removed.
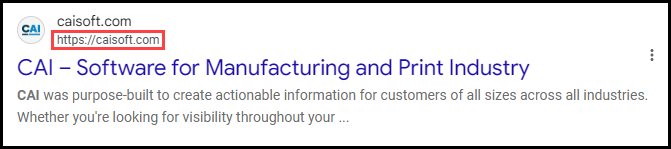
MarketDirect StoreFront recommends you choose a URL-friendly version of the product name for the URL Slug field.
● Meta Description: Enter the short description shown in search results. The default Meta Description is the product's Short description.
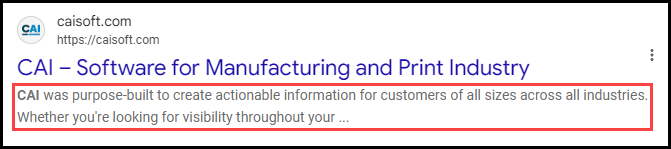
The best practice is to keep the Meta Description to 50 words or less.
Kit
tabThe Kit tab is where you associate products to the Kit and configure the settings for those products.
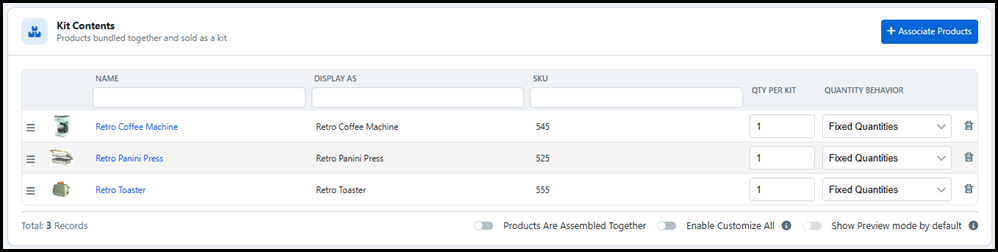
You can filter the products associated to the
kit using the Name, Display As,
and SKU
search fields. Also,
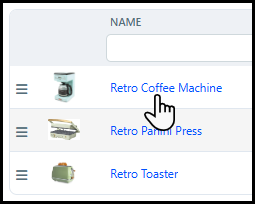
you can open the product builder for an associated product by
clicking the name in the Associated
Products table.
1 Click Associate Products to open the Find Product window.
2 Select the check-box for the products you want to associate to the kit.
You can associate any product type to a kit except for another kit.
3 Click Save.
4 Complete the necessary Kit Contents fields:
● Qty per Kit: Enter the default quantity for each product available in the kit.
● Quantity Behavior: Choose an option that determines if the buyer can alter the default quantity.
● Fixed Quantities: The buyer cannot change the default quantity.
If all of the products in the kit have Fixed Quantities then you can either assign a price on the Pricing tab or let MarketDirect StoreFront calculate the pricing based on the components in the Kit. If you allow buyers to change item quantities, then the system will calculate a price based on the components even if you assign a price on the Pricing tab.
● Allow Changes (Allow Zero): The buyer can change the default quantity, as well as opt-out of purchasing the product by entering a quantity of zero.
● Allow Changes (Reject Zero): The buyer can change the default quantity, but cannot opt-out of purchasing the product by entering a quantity of zero.
● Products Are Assembled Together: Enable this setting to notify an integrated MIS that all products in the Kit are to be assembled into a single finished product.
For example, a cover and interior
text pages are bound into a single finished product such as a
booklet.
Disabling this field will notify the MIS that each product in the
Kit is a separate finished
product such as a new employee kit containing business cards,
handbook, and a personalized pen.
For more information on Management Information Systems such as
Pace, PrintSmith Vision, or Monarch, see MIS
Systems.
● Enable Customize All: Enable this setting to make the Customize All button available on the buyer side. The Customize All button allows buyers to edit the same personalization field in all the SmartCanvas templates available in the Kit at the same time.
For example, a SmartCanvas Kit contains the same background image field in each template. If a buyer clicks the Customize All button and changes the background image, then the background image will change for the other templates as well.
This is setting only applies to Kits containing SmartCanvas products only.
● Show Preview mode by default: Enable this setting to make the Preview mode the default view for buyers instead of the SmartCanvas editor.
This is setting only applies to Kits containing SmartCanvas products only.
5 Click Save.
Shipping
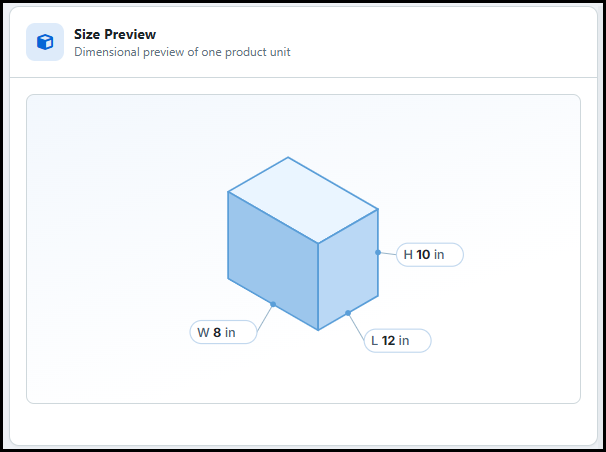
tabThe Shipping tab is where you specify the product dimensions for shipping cost calculations.
● Unit of Measure for Weight: This field will auto-populate to the Unit of Measure for Weight of the products already added to the kit. Options include ounce (oz), pound (lb), gram (g), and kilogram (kg).
● Unit Quantity: This field will auto-populate to one unit to represent each kit.
● Weight: If each product in the kit has a Fixed Quantity, this field will auto-populate to the combined weight of all the products. If one or more of the products allow changes to their quantity, this field will auto-populate to zero.
The Unit of Measure for Weight, Unit Quantity, and Weight fields cannot be edited.
● Max Quantity per Subcontainer: Enter the maximum number of units allowed per sub-container. If no sub-container is used, this value reflects the dimensions of the shipping container to ship a single unit.
● Unit of Measure for Dimensions: Choose the unit of measurement for the product's dimensions. Options include Inches, Feet, Centimeters, Meters, millimeters (mm), Yards, or TWIP.
● Width: Enter the product width in the selected dimension measurement.
● Length: Enter the product length in the selected dimension measurement.
● Height: Enter the product height in the selected dimension measurement.
● Ship item separately: Enable to ensure the product ships in its own dedicated package.
Displays a preview of one product unit based on the entered Width, Length, and Height.
Pricing
tabThe Pricing tab is where you setup the price per Kit as long as all of the products in the Kit have Fixed Quantities. If you allow buyers to change product quantities, then MarketDirect StoreFront will auto-calculate a Kit price based on the product price and quantity ordered. For example, if you have a Kit with two products each worth five dollars and the buyer orders two of each product, then the Kit price will be twenty dollars.
● If the Sales Tax model is applied, then the following fields appear:
● Exempt Taxes: Enable to exclude the product from tax calculations.
● If the VAT model is applied, then the following fields appear:
● Use Print Shop Setting: Select to use the Print Shop VAT Numbers.
● Select Cross Border VAT Definition: Select and choose a VAT sheet from the drop-down list.
● Fixed Rate: Select and choose a fixed VAT rate for the product.
● Exempt Shipping Charges: Enable to exclude shipping charges for the product.
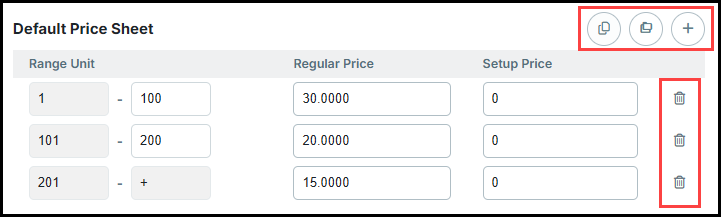
● Price Sheets: Select the specific price sheet(s) to edit. You can use the search bar to filter the listed price sheets.
● Range Unit: Enter the quantity range for a price tier.
● Regular Price: Enter the standard price for that quantity range.
● Setup Price: Enter the setup or handling cost for that quantity range. The Setup Price is only applied to a product one time per order.
Click the Add
icon to add a new range
unit. Click the Trash
can icon to delete a
range unit. Click the Copy,
Paste Range, and Paste All icons
to copy and paste range units into other price sheets.
Security
tabThe Security tab is where you can assign owners to the product and set permissions for them. This enables you to make the product available for editing, managing, and/or publishing by a particular user or group of users.
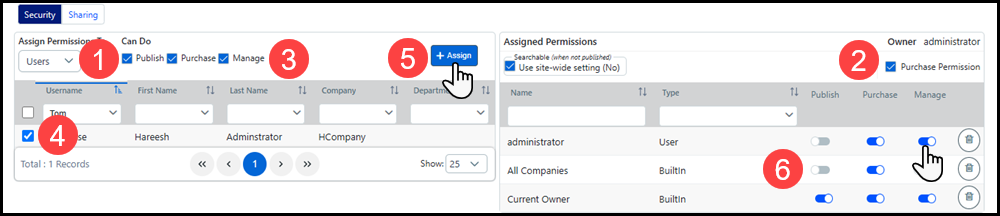
● Assign Permissions To: Choose the category of users to view in the Assign Permissions table. The category options include Users, Groups, Companies, and Departments. You will select specific users, user groups, companies, or departments from the table to give managing and publishing permissions for the product.
If the MarketDirect StoreFront is configured for entities, then the product can be shared with different entities. For more information, see Managing Entities.
● Purchase Permission: Enable the Purchase permission in the Can Do area.
● Can Do: Select which permissions to give the user.
● Publish: The selected users can publish the product to the storefront.
The Publish permission requires the Manage permission in order to work.
● Purchase: The selected users can purchase the product.
● Manage: The selected users can edit the product settings.
● Select users from the Assign Permissions table.
● Click Assign to grant the selected users with the selected permissions.
● Assigned Permissions: View users with granted permission from the table. User permissions can be enabled and disabled from the table using the toggles.
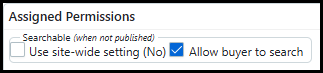
By default, buyers will not be able to search
and locate an unpublished product. If you want buyers to be able
to find an unpublished product on the storefront, then disable
Use site-wide setting (No) and enable Allow
buyer to search.
Publish
a Kit product1 Go to Administration > Products.
2 Locate the Kit you want to publish and hover on the quick access menu.
3 Select the Publish option to open the Publish/Un-Publish window.
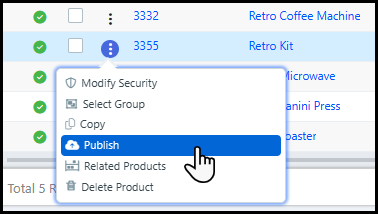
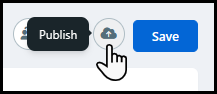
You can also open the Publish/Un-Publish window
by clicking the Publish
button in the Product Information header.
4 Select where you want to publish the Kit. You can publish the Kit to a storefront or directly to a category.
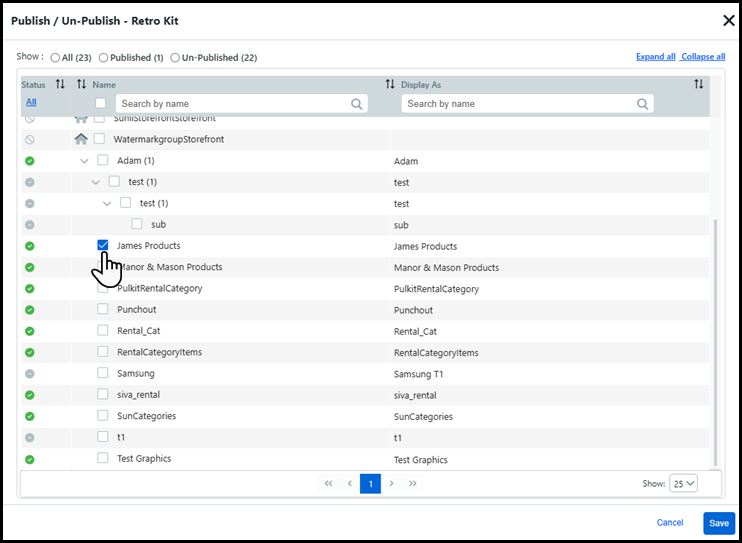
To remove the Kit
from a storefront or category, de-select it and click Save.
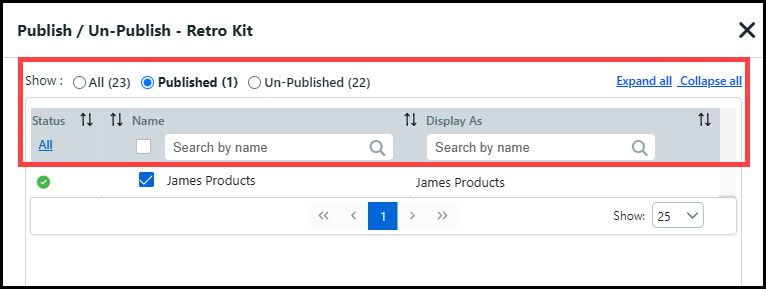
You can filter the table by using the search and sort tools for
each column, or by selecting the appropriate Show
radio button which will
only show the storefront(s) and category(ies) in that view.
5 Click Save.
MarketDirect StoreFront
recommends viewing the Kit
on the storefront to see how it appears to buyers.
For instructions on creating Kit products using the classic product builder, see Create Products.